Add vendors and grant dashboard access.
Learn how Shipturtle syncs Shopify vendors and how merchants add their first vendor with dashboard access.
There are four ways by which merchants can add vendors:
Through Shopify
Upon installation, Shipturtle syncs all vendors from the merchant's Shopify store and fetches all their products. An entry is made for each vendor automatically.
To give vendor access, merchants will need to create a user for each of them (Covered below).
Refer to: Create User
Vendor Sign-up
Vendors can register themselves through the registration process. Merchants will receive the request under Vendors> Approve Vendor. Upon acceptance, vendors will receive their login credentials along with the login link.
Create Vendor Manually
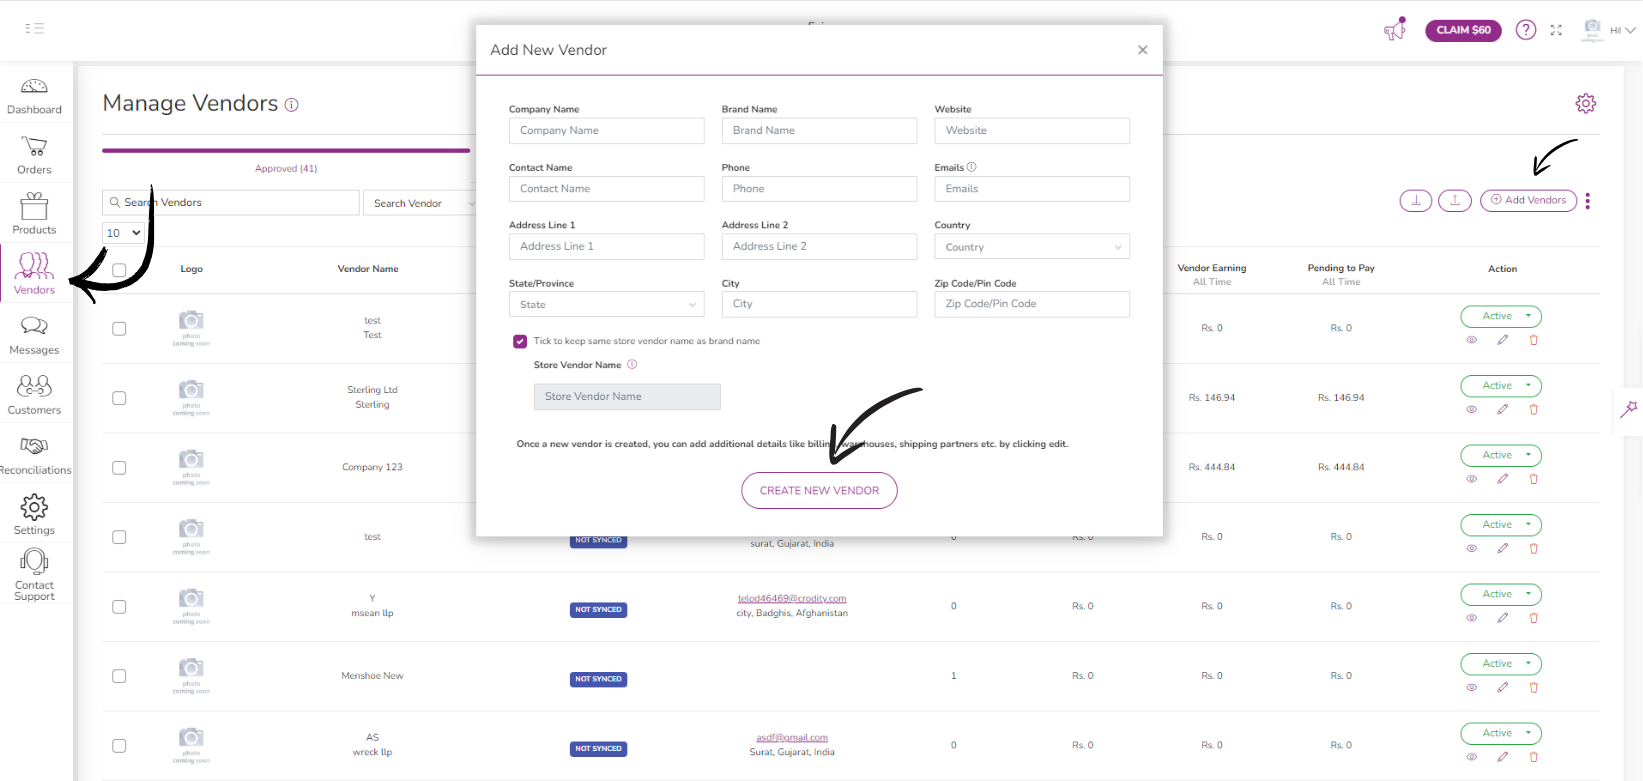
Merchants can manually create a new vendor by entering their details directly from the merchant dashboard.
Steps:
- Go to Vendors > Manage Vendors > Click on + Add Vendors > Fill in all required details such as vendor name, brand name, contact information, phone number, address, etc. > Save.

Once the vendor is created, their user credentials will be automatically generated and sent to them via email. Vendors can use these credentials to log in at app.shipturtle.com.
Bulk Import Vendors
Merchants can create/edit vendors in bulk by importing Excel files.
Steps:
- Go to Vendors> Click on the Import icon.
- Download the sample file and update the file with all the vendor details (instructions are mentioned in the file.).
- Import the updated file.
Note: Once the file is imported, vendors will be created and visible in the vendor list. Additionally, vendors will receive their login credentials, which they can use to log in to app.shipturtle.com.
